How many of us receive hundreds of emails each day that clog our inbox or perhaps we just have a desire to better organize how we process email. I have written previously on this topic, but one area of automation that could be a complete game changer for you.
Wouldn't it be amazing if you could send some emails directly into a designated folder and never see them sitting in your inbox?
You're in luck, there is a handy little way to do this with most email clients.
Outlook does this especially well with what they call "rules". Back when I used Outlook, I had a rule for just about every type of email that came through my inbox. It was extremely helpful to me and my productivity at the time. Since making the switch to Gmail as my primary work email client, I have missed using rules for organization.
But I recently learned that you can do the exact same thing in Gmail!
It is easy and simple and can change your life in just a few short clicks. Below is a quick little guide to help you out.
Step 1: Open the email you want to send to a specific folder
Step 2: Click on the upside down arrow
Step 3: Select "Filter messages like this" from the dropdown menu
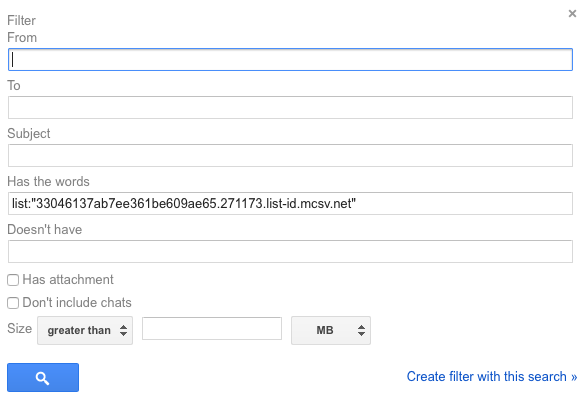
You should see this screen next.
Copy the email address in the "From" field and paste it into the "Has the words" field. This should help also direct emails you send into that folder in the future.
Then click "Create filter with this search" and you will see the following menu.
Step 4: Select what you want to do with these messages when they hit your inbox. If you want it to skip your inbox and go straight into a specific folder, click "Skip the Inbox" and then "Apply the label". On the dropdown menu next to "Apply the label" you can select the folder you want it to go into or create a new folder for it.
You can also select to apply this "filter" to other messages or conversations in your inbox. This will process those emails you have already received according to this new "filter."
After you have selected all you want to do with these types of emails, click "Create filter"
Success! You have now set up your very first email filter!


